In this example application we will be create a Validation form in Spring 3.0 MVC Framework. The validation of the form is done using annotation. The Hibernate validator framework is used for validation of the form data.
The application will present simple user registration form to the user. Form will have the following fields:
- User Name
- Age
- Password
The validator framework will validate the user input. If there is any validation error application will display the appropriate message on the form.
To use the validation framework in the application "hibernate-validator-4.0.2.GA.jar" and " validation-api-1.0.0.GA.jar" must be added to the project libraries.
Application uses following jar files:

Step 1:
Create index.jsp under WebContent . The code index.jsp as :
<%@ page language="java" contentType="text/html; charset=ISO-8859-1" pageEncoding="ISO-8859-1"%> <!DOCTYPE html PUBLIC "-//W3C//DTD HTML 4.01 Transitional//EN""http://www.w3.org/TR/html4/loose.dtd"> <html> <head> <meta http-equiv="Content-Type" content="text/html; charset=ISO-8859-1"> <title>Spring 3, MVC Examples</title> </head> <body> <h1>Spring 3, MVC Examples</h1> <ul> <li><a href="forms/validationform.html">Validation Form</a></li> </ul> </body> </html> |
In the above page we are creating a new link to access the Validation Form example from the index page of the application.
Step 2:
Now we will create a model class " ValidationForm.java" under src folder . The code of "ValidationForm.java" is:
package net.roseindia.form;


import javax.validation.constraints.Max;

import javax.validation.constraints.Min;

import javax.validation.constraints.Size;

import javax.validation.constraints.NotNull;

import org.hibernate.validator.constraints.NotEmpty;

import org.springframework.format.annotation.NumberFormat;

import org.springframework.format.annotation.NumberFormat.Style;


public class ValidationForm {

        @NotEmpty

        @Size(min = 1, max = 20)

        private String userName;

        @NotNull

        @NumberFormat(style = Style.NUMBER)

        @Min(1)

        @Max(110)

        private Integer age;

        @NotEmpty(message = "Password must not be blank.")

        @Size(min = 1, max = 10, message = "Password must between 1 to 10 Characters.")

        private String password;


        public void setUserName(String userName) {

                this.userName = userName;

        }


        public String getUserName() {

                return userName;

        }


        public void setAge(Integer age) {

                this.age = age;

        }


        public Integer getAge() {

                return age;

        }


        public void setPassword(String password) {

                this.password = password;

        }


        public String getPassword() {

                return password;

        }

}
In the above class we have added the proper annotation for validating the form values. Here is the list of annotation used for validation:
@NotEmpty
@Size(min = 1, max = 20)
@NotNull
@NumberFormat(style = Style.NUMBER)
@Min(1)
@Max(110)
@NotEmpty(message = "Password must not be blank.")
@Size(min = 1, max = 10, message = "Password must between 1 to 10 Characters.")
Step 3 :
Now create a folder views under WebContent/WEB-INF . Again cerate "validationform.jsp" under WebContent/WEB-INF/views as :
<%@ page language="java" contentType="text/html; charset=ISO-8859-1" pageEncoding="ISO-8859-1"%> <%@taglib prefix="form" uri="http://www.springframework.org/tags/form"%> <!DOCTYPE html PUBLIC "-//W3C//DTD HTML 4.01 Transitional//EN""http://www.w3.org/TR/html4/loose.dtd"> <html> <head> <meta http-equiv="Content-Type" content="text/html; charset=ISO-8859-1"> <title>Insert title here</title> </head> <body> <form:form method="post" action="validationform.html" commandName="validationForm"> <table> <tr> <td>User Name:<font color="red"><form:errors path="userName" /></font></td> </tr> <tr> <td><form:input path="userName" /></td> </tr> <tr> <td>Age:<font color="red"><form:errors path="age" /></font></td> </tr> <tr> <td><form:input path="age" /></td> </tr> <tr> <td>Password:<font color="red"><form:errors path="password" /></font></td> </tr> <tr> <td><form:password path="password" /></td> </tr> <tr> <td><input type="submit" value="Submit" /></td> </tr> </table> </form:form> </body> </html> |
In this above jsp file <form:errors path="..." /> tag is used to display the validation error messages.
Step 4:
Now create "validationsuccess.jsp" file under WebContent/WEB-INF/views . The code of "validationsuccess.jsp" is :
<%@ page language="java" contentType="text/html; charset=ISO-8859-1" pageEncoding="ISO-8859-1"%> <%@taglib prefix="core" uri="http://java.sun.com/jsp/jstl/core" %> <!DOCTYPE html PUBLIC "-//W3C//DTD HTML 4.01 Transitional//EN""http://www.w3.org/TR/html4/loose.dtd"> <html> <head> <meta http-equiv="Content-Type" content="text/html; charset=ISO-8859-1"> <title>Insert title here</title> </head> <body> <core:out value="${validationForm.userName}" /> Save Successfully. </body> </html> |
Step 5:
Now create Contoller class "ValidationController.java" under src folder. Controller class use for RequestMapping and process the user request. The code of "ValidationController.java" as:
package net.roseindia.controllers;


import net.roseindia.form.ValidationForm;

import java.util.Map;

import javax.validation.Valid;

import org.springframework.stereotype.Controller;

import org.springframework.validation.BindingResult;

import org.springframework.web.bind.annotation.RequestMapping;

import org.springframework.web.bind.annotation.RequestMethod;


@Controller

@RequestMapping("/validationform.html")

public class ValidationController {


        // Display the form on the get request

        @RequestMapping(method = RequestMethod.GET)

        public String showValidatinForm(Map model) {

                ValidationForm validationForm = new ValidationForm();

                model.put("validationForm", validationForm);

                return "validationform";

        }


        // Process the form.

        @RequestMapping(method = RequestMethod.POST)

        public String processValidatinForm(@Valid ValidationForm validationForm,

                        BindingResult result, Map model) {

                if (result.hasErrors()) {

                        return "validationform";

                }

                // Add the saved validationForm to the model

                model.put("validationForm", validationForm);

                return "validationsuccess";

        }


}
The @RequestMapping annotation is used for request uri mapping.
Step 6:
Now modify web.xml as:
<?xml version="1.0" encoding="UTF-8"?> <web-app version="2.5" xmlns="http://java.sun.com/xml/ns/j2ee" xmlns:xsi="http://www.w3.org/2001/XMLSchema-instance" xsi:schemaLocation="http://java.sun.com/xml/ns/j2ee http://java.sun.com/xml/ns/j2ee/web-app_2_5.xsd"> <display-name>Spring3Example</display-name> <servlet> <servlet-name>dispatcher</servlet-name> <servlet-class>org.springframework.web.servlet.DispatcherServlet</servlet-class> <load-on-startup>1</load-on-startup> </servlet> <servlet-mapping> <servlet-name>dispatcher</servlet-name> <url-pattern>/forms/*</url-pattern> </servlet-mapping> <welcome-file-list> <welcome-file>index.jsp</welcome-file> </welcome-file-list> </web-app> |
Step 7:
Again create "dispatcher-servlet.xml" under WebContent/WEB-INF . The "dispatcher-servlet.xml" code as :
<?xml version="1.0" encoding="UTF-8"?> <beans xmlns="http://www.springframework.org/schema/beans" xmlns:xsi="http://www.w3.org/2001/XMLSchema-instance" xmlns:p="http://www.springframework.org/schema/p" xmlns:context="http://www.springframework.org/schema/context" xmlns:mvc="http://www.springframework.org/schema/mvc" xsi:schemaLocation=" http://www.springframework.org/schema/beans http://www.springframework.org/schema/beans/spring-beans-3.0.xsd http://www.springframework.org/schema/context http://www.springframework.org/schema/context/spring-context-3.0.xsd http://www.springframework.org/schema/mvc http://www.springframework.org/schema/mvc/spring-mvc-3.0.xsd "> <!-- Enable annotation driven controllers, validation etc... --> <mvc:annotation-driven /> <context:component-scan base-package="net.roseindia.controllers"/> <bean id="viewResolver" class="org.springframework.web.servlet.view.InternalResourceViewResolver"> <property name="prefix"> <value>/WEB-INF/views/</value> </property> <property name="suffix"> <value>.jsp</value> </property> </bean> <bean id="messageSource"class="org.springframework.context.support.ReloadableResourceBundleMessageSource"> <property name="basename" value="/WEB-INF/messages" /> </bean> </beans> |
Where <mvc:annotation-driven> is used for annotation driven controllers and validation. While message Resource configuration is done in "dispatcher-servlet.xml" using following entry:
<bean id="messageSource"class="org.springframework.context.support.ReloadableResourceBundleMessageSource"> <property name="basename" value="/WEB-INF/messages" /> </bean> |
Again create customization Message file "messages.properties" under WebContent/WEB-INF. The modify "messages.properties" as
NotEmpty.validationForm.userName=User Name must not be blank. Size.validationForm.userName=User Name must between 1 to 20 characters. |
Step 8:
Now run Application display output as :
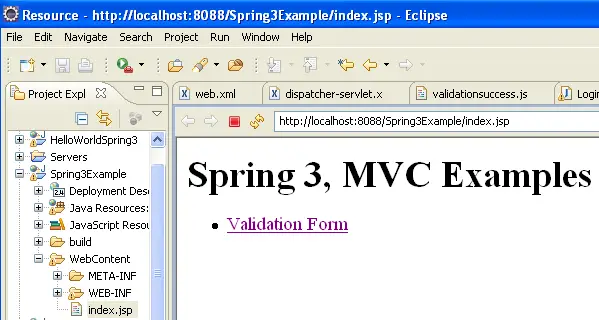
if click Validation Form hyperlink then open validationform as :

Step 9:
Now Enter userName, Age and Password if find any error display as:

Again display error-

If validation success then display validationsucess page as :

In this we have studies the use of annotation controller and annotated validators.