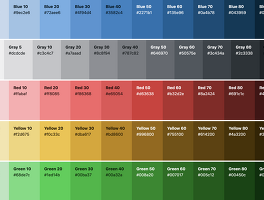
설치 환경
OS : WINDOW
APM : XAMPP 1.7.7 ( 2011.12. 15
Redmine Version : 1.3.0 ( 2011.12.15)
SVN Server : VisualSVN
추가 : 개인적 취향으로 무설치 portable을 좋아하기 때문에
가능한한 portable로 설치 위주로 한다.
1.설치전 준비사항 보기
1.xampp 설치 및 다운(난 포터블 버전 받아서 사용 했음)
홈페이지 : http://www.apachefriends.org/en/xampp-windows.html
다운로드 : http://www.apachefriends.org/download.php?xampp-win32-1.7.7-VC9.zip
설치파일 :
2.redmine 1.3.0 (zip)
홈페이지 :
다운로드 : http://rubyforge.org/frs/?group_id=1850
설치파일 :
* 참고 : redmine은 필요한 모듈들 버전이 좀 많다.
그거 안 맞춰주면 설치도중 어이 없는 일이 발생 할 수 있고
gem 믿고 그냥 install 했다가는 다른 버전이 설치 되는 경우도 있다.
실은 gem install만 믿다가 궤삽질 좀 했다. 왜 안되지 하므서.
그러니 설치하고 꼭 요구 버전을 꼼꼼히 확인 하자.
안그러면 설치 끝물에 짜증 만땅난다.
설치 요구버전 참조 : http://www.redmine.org/projects/redmine/wiki/RedmineInstall
redmine 1.3.0(2011.12.15)에서의 요구사항 발췌
| Redmine version | Supported Ruby versions | Required Rails version | Required Rack version |
|---|---|---|---|
| current trunk | ruby 1.8.7, 1.9.2, 1.9.3 | Rails 2.3.14 | Rack 1.1.1 |
| trunk from r2887 to r4903 | ruby 1.8.6, 1.8.7 | Rails 2.3.5 | Rack 1.0.1 |
| trunk from r2493 to r2886 | ruby 1.8.6, 1.8.7 | Rails 2.2.2 | |
| trunk before r2493 | ruby 1.8.6, 1.8.7 | Rails 2.1.2 | |
| 1.3.x | ruby 1.8.6, 1.8.7 | Rails 2.3.14 | Rack 1.1.1 |
| 1.2.x | ruby 1.8.6, 1.8.7 | Rails 2.3.11 | Rack 1.1.1 |
| 1.1.x | ruby 1.8.6, 1.8.7 | Rails 2.3.5 | Rack 1.0.1 |
| 1.0.x | ruby 1.8.6, 1.8.7 | Rails 2.3.5 | Rack 1.0.1 |
| 0.9.x | ruby 1.8.6, 1.8.7 | Rails 2.3.5 | Rack 1.0.1 |
| 0.8.x | ruby 1.8.6, 1.8.7 | Rails 2.1.2 |
Official releases include the appropriate Rails version in their vendor directory so you only need to make sure
- Ruby 1.9 is not supported yet. You have to use Ruby 1.8.x as stated above.
- RubyGems 1.3.7 or higher is required with following limitations :
- Rails 2.3.5 will fail with RubyGems 1.5.0 or later, stick to previous versions of RubyGems !
- Rails 2.3.11 will fail with RubyGems 1.7.0 or later, stick to previous versions of RubyGems !
- Rake 0.8.7 is required (rake 0.9.x is not supported by Rails yet)
- Rack 1.1.x is required, 1.1.0 has a bug with quotes (#8416). Database migration would fail with other version.
- Mongrel 1.1.5 needs a patch attached to #7688 to work fine with Rails 2.3.11. In case of upgrade, another issue may appear for some time after migration (#7857).
- I18n 0.4.2 is required for Redmine >= 1.0.5
- Rails 2.3.11 to 2.3.14 suffer from a major issue with sending mails to multiple recipients, see #8751 for details and solution.
- Rails 2.3.14 is a minor security release known to work fine with Redmine 1.2.x series (except for previous point) and can be used as a replacement for 2.3.11 (read
config/environment.rbfirst).
표 말고 아래쪽도 유심히 잘보고 확인해라
rake는 나같은 경우는 0.9.2.2가 깔려서 이후 작업시 에러남.(create_session_store시)
3.ruby ( ruby 1.8.7) <-- 조심해라
홈페이지 : http://rubyforge.org/
다운로드 : http://rubyforge.org/frs/download.php/74296/ruby-1.8.7-p334-i386-mingw32.7z
설치파일 :
4.VisualSVN (VERSION 2.5.2 ) <-- 아쉽게도 설치본 ㅠㅠ
홈페이지 : http://www.visualsvn.com
다운로드 :
설치파일 :
2.각종 경로 및 설치 보기
1.xampp : 적당한 경로( c:\ 말고 )에 압축 푼다.
2.ruby : xampp\ruby 폴더 만들어서 거기 압축 푼다.
3.redmine : 나같은 경우는 xampp\project\redmine에 압축 풀었음.
4.visualsvn : 그냥 install 후 repo는 c:\아닌곳 아무곳
3.각종 셋팅 보기
1.xampp 설정
setup_xampp.bat 한번 실행 해주고 뭐 특별히 해줄 건 없음.
2.ruby
2-1.윈도우 환경 변수에 ruby/bin 폴더 등록한다.
2-2.환경 변수에 등록 해놔서 굳이 이동 하지 않아도 되지만
편의상 cmd에서 ruby/bin폴더로 이동한다.
2-2이후부턴 ruby/bin폴더에서 cmd로 작업한다.
2-3. ruby -v 쳐본다
출력 : ruby 1.8.7 (2011-02-18 patchlevel 334) [i386-mingw32]
2-4.gem -v 쳐본다
출력 : 1.5.2
2-5. 업데이트 한번
gem update --system
출력 :
Updating rubygems-update
Fetching: rubygems-update-1.8.12.gem (100%)
Successfully installed rubygems-update-1.8.12
Installing RubyGems 1.8.12
RubyGems 1.8.12 installed
== 1.8.12 / 2011-12-02
* Bug fix:
* Handle more cases where Syck's DefaultKey showed up in requirements
and wasn't cleaned out.
------------------------------------------------------------------------------
RubyGems installed the following executables:
2.6.rails 설치 꼭 Rails 2.3.14
gem install rails -v=2.3.14
Fetching: rake-0.9.2.2.gem (100%)
Fetching: activesupport-2.3.14.gem (100%)
Fetching: activerecord-2.3.14.gem (100%)
Fetching: rack-1.1.2.gem (100%)
Fetching: actionpack-2.3.14.gem (100%)
Fetching: actionmailer-2.3.14.gem (100%)
Fetching: activeresource-2.3.14.gem (100%)
Fetching: rails-2.3.14.gem (100%)
Successfully installed rake-0.9.2.2
Successfully installed activesupport-2.3.14
Successfully installed activerecord-2.3.14
Successfully installed rack-1.1.2
Successfully installed actionpack-2.3.14
Successfully installed actionmailer-2.3.14
Successfully installed activeresource-2.3.14
Successfully installed rails-2.3.14
8 gems installed
Installing ri documentation for rake-0.9.2.2...
Installing ri documentation for activesupport-2.3.14...
Installing ri documentation for activerecord-2.3.14...
Installing ri documentation for rack-1.1.2...
Installing ri documentation for actionpack-2.3.14...
Installing ri documentation for actionmailer-2.3.14...
Installing ri documentation for activeresource-2.3.14...
Installing ri documentation for rails-2.3.14...
Installing RDoc documentation for rake-0.9.2.2...
Installing RDoc documentation for activesupport-2.3.14...
Installing RDoc documentation for activerecord-2.3.14...
Installing RDoc documentation for rack-1.1.2...
Installing RDoc documentation for actionpack-2.3.14...
Installing RDoc documentation for actionmailer-2.3.14...
Installing RDoc documentation for activeresource-2.3.14...
Installing RDoc documentation for rails-2.3.14...
위와 같이 설치 되는데 아주 중요한게..
이후에 설치 할 것이 gem install rack인데 위쪽 빨간 글씨보다 시피 rails 설치 시 자동으로
추가 설치가 된다.
추가 설치가 되는 건 참 고마운데 문제는 rack 자동 설치 되는 버전이 1.1.2라는 것이다.
이게 뭐가 문제가 되냐면 상단에 버전 요구사항 보면 rack은 v.1.1.1을 요구한다
고작 0.1 버전 차이인데 내 경우는 이후에 뭔가르르 할떄 죄다 에러가 났다.
그러니 걍 속편하게 초장부터 요구 버전을 철저히 맞춰 준다.
1.먼저 인스톨 된 rack 버전 확인해 본다
gem list -d rack
*** LOCAL GEMS ***
rack (1.1.2)
현재 설치 된 버전은 1.1.2다. 만일 이외에 다른게 여러개 더 있으면 죄다 삭제 하는게 상책이다.
나중에 삽질 하기 싫으면 말이다.
(즉 설치시 요구하는 버전과 딱 맞는 버전 하나만 놔두고 다 삭제 )
2.설치된 rack 삭제 한다.
gem uninstall rack -v=1.1.2
You have requested to uninstall the gem:
rack-1.1.2
actionpack-2.3.14 depends on [rack (~> 1.1.0)]
If you remove this gems, one or more dependencies will not be met.
Continue with Uninstall? [Yn] Y
Remove executables:
rackup
in addition to the gem? [Yn] Y
Removing rackup
Successfully uninstalled rack-1.1.2
3.삭제 후 한번 확인 해 본다
gem list -d rack
*** LOCAL GEMS ***
4.요구하는 버전인 rack 1.1.1을 설치 한다.
gem install rack -v=1.1.1
*** LOCAL GEMS ***
F:\work\xampp\ruby\bin>gem install rack -v=1.1.1
Fetching: rack-1.1.1.gem (100%)
Successfully installed rack-1.1.1
1 gem installed
Installing ri documentation for rack-1.1.1...
Installing RDoc documentation for rack-1.1.1...
5.확인해 본다
gem list -d rack
*** LOCAL GEMS ***
rack (1.1.1)
Author: Christian Neukirchen
Rubyforge: http://rubyforge.org/projects/rack
Homepage: http://rack.rubyforge.org
Installed at: F:/work/xampp/ruby/lib/ruby/gems/1.8
a modular Ruby webserver interface
2-7.i18n 설치
gem install -v=0.4.2 i18n
Fetching: i18n-0.4.2.gem (100%)
Successfully installed i18n-0.4.2
1 gem installed
Installing ri documentation for i18n-0.4.2...
Installing RDoc documentation for i18n-0.4.2...
2-8.mongrel 설치
gem install mongrel
Fetching: gem_plugin-0.2.3.gem (100%)
Fetching: cgi_multipart_eof_fix-2.5.0.gem (100%)
Fetching: mongrel-1.1.5-x86-mingw32.gem (100%)
Successfully installed gem_plugin-0.2.3
Successfully installed cgi_multipart_eof_fix-2.5.0
Successfully installed mongrel-1.1.5-x86-mingw32
3 gems installed
Installing ri documentation for gem_plugin-0.2.3...
Installing ri documentation for cgi_multipart_eof_fix-2.5.0...
Installing ri documentation for mongrel-1.1.5-x86-mingw32...
Installing RDoc documentation for gem_plugin-0.2.3...
Installing RDoc documentation for cgi_multipart_eof_fix-2.5.0...
Installing RDoc documentation for mongrel-1.1.5-x86-mingw32...
2-9.mysql driver 설치
gem install mysql
Fetching: mysql-2.8.1-x86-mingw32.gem (100%)
Successfully installed mysql-2.8.1-x86-mingw32
1 gem installed
Installing ri documentation for mysql-2.8.1-x86-mingw32...
No definition for next_result
No definition for field_name
.......
2-10.mongrel-service 설치 + win32-service 설치
참조 사이트 주소 :
http://www.redmine.org/projects/redmine/wiki/HowTo_Install_Redmine_in_a_sub-URI_on_Windows_with_Apache
참조 사이트 내용 보기
HowTo Install Redmine in a sub-URI on Windows with Apache
- HowTo Install Redmine in a sub-URI on Windows with Apache
Following the steps below exactly as listed will produce a working Redmine installation hosted under http://localhost/redminesub-URI on Windows XP/2003/2008 x86/x64 with Apache HTTP Server 2.2.x, MySQL 5.1.x, PHP 5.3.x and Ruby 1.8.7.
This walk-through was tested with Redmine 1.0.4.devel.4543 but should work with any version >= 0.8 .
The intended audience for this walk-through are Windows users.
In case you encounter problems, please look at this forum thread for information about some known issues and their workarounds
Install Apache HTTP server 2.2.x
- Download "Win32 Binary without crypto (no mod_ssl) (MSI Installer)" or "Win32 Binary including OpenSSL (MSI Installer)", depending if you intend to use SSL on your webserver, from here
- Install to C:\webserver\Apache\
Install MySQL 5.1.x
- Download "Windows (x86, 32-bit), MSI Installer - Essentials - Recommended" from here
- (the 64-bit version could be installed on x64 Windows platforms, but the 32-bit version is recommended and it works well on both x86 and x64 versions of Windows.)
- Install to C:\webserver\MySQL\
- During initial setup:
- (optional:) set data files installation directory to C:\webserver\MySQL_Data\
- During Server Instance Configuration Wizard:
- (optional:) Add firewall exception for the port used
- set default character set to "Best Support for Multilingualism" UTF8
- select "Include Bin Directory in Windows PATH"
- During initial setup:
Install MySQL Workbench 5.2.x
- Download "Windows (x86, 32-bit), MSI Installer" from here
- Install to C:\webserver\MySQL_Workbench\
Install PHP 5.3.x
- Download "VC6 x86 Thread Safe - Installer" from here
- Install to C:\webserver\PHP\
- During setup:
- for webserver, choose "Apache 2.2.x Module"
- configuration directory is "C:\webserver\Apache\conf\"
- you can leave all default Extensions as they are, optionally adding "Internationalization" and "Multi-Byte String"
- During setup:
Install Ruby 1.8.7 with RubyGems
- At the time of writing this document the latest version of Ruby was 1.9.2, however for best compatibility use Ruby version 1.8.7.
- Download "rubyinstaller-1.8.7-p302.exe" from here
- Install to C:\webserver\Ruby\
- During setup, select "Add Ruby executables to your PATH"
- Verify Ruby version
- Open command window, execute:
ruby -v
- expected output:
ruby 1.8.7 (2010-08-16 patchlevel 302) [i386-mingw32]
- expected output:
- Open command window, execute:
- Verify RubyGems version
- in command window, execute:
gem -v
- expected output:
1.3.7
- At the time of writing this document the latest version of RubyGems was 1.3.7. Versions >= 1.5.0 won't work with Redmine 1.1.x.
- expected output:
- in command window, execute:
- If you get errors about missing "SSLEAY32.dll", install PHP as shown above and this dll will become available
Additional gems
- mongrel-service and win32-service gems have to be downloaded manually. Download locations are added to sections below.
Install Rake
- At the time of writing this document the latest version of Rake was 0.8.7. Newer versions should work too.
- Install Rake gem
- in command window, execute:
gem install rake
- expected output:
Successfully installed rake-0.8.7
- expected output:
- in command window, execute:
Install Rails
- At the time of writing this document, the latest version of Rails is 3.0.3, but Redmine 1.0.4 installation requires Rails 2.3.5.
- Install Rails gems
- in command window, execute:
gem install rails -v=2.3.5
- expected output:
Successfully installed activesupport-2.3.5 Successfully installed activerecord-2.3.5 Successfully installed rack-1.0.1 Successfully installed actionpack-2.3.5 Successfully installed actionmailer-2.3.5 Successfully installed activeresource-2.3.5 Successfully installed rails-2.3.5 7 gems installed
- expected output:
- in command window, execute:
Install i18n
- At the time of writing this document, the latest version of i18n is 0.5, but Redmine 1.0.4 installation requires i18n 0.4.2.
- Install i18n gem
- in command window, execute:
gem install -v=0.4.2 i18n
- expected output:
Successfully installed i18n-0.4.2 1 gem installed
- expected output:
- in command window, execute:
Install Mongrel
- At the time of writing this document the latest version of Mongrel was 1.1.5. Newer versions should work too.
- Project page
- Install Mongrel gems
- in command window, execute:
gem install mongrel
- expected output:
Successfully installed gem_plugin-0.2.3 Successfully installed cgi_multipart_eof_fix-2.5.0 Successfully installed mongrel-1.1.5-x86-mingw32 3 gems installed
- expected output:
- in command window, execute:
Install mysql gem
- At the time of writing this document the latest version of mysql gem was 2.8.1. Newer versions should work too.
- It drastically improves page generation speed.
- Install mysql gem
- in command window, execute:
gem install mysql
- expected output:
Successfully installed mysql-2.8.1-x86-mingw32 1 gem installed Installing ri documentation for mysql-2.8.1-x86-mingw32... No definition for (...)
- The gem was made for MySQL 5.0 so there are some additional features in 5.1 which will not be defined, so you will see a number of lines about missing definitions, but it does not cause any problems
- expected output:
- in command window, execute:
Install mongrel-service + win32-service gems
- At the time of writing this document the latest version of win32-service was 0.7 which does NOT work with Ruby 1.8.7
- Use only win32-service version 0.5.2 for Redmine deployment.
- Download "mongrel_service-0.3.4-i386-mswin32.gem" from here
- Move mongrel_service-0.3.4-i386-mswin32.gem to C:\webserver\
- Download "win32-service-0.5.2-mswin32.gem" from here
- This file is also attached at the bottom of this wiki page
- Move win32-service-0.5.2-mswin32.gem to C:\webserver\
- Install the gem
- in command window, execute:
cd C:\webserver\ gem install mongrel_service
- expected output:
Successfully installed win32-service-0.5.2-x86-mswin32 Successfully installed mongrel_service-0.3.4-x86-mswin32 2 gems installed
- expected output:
- in command window, execute:
- Delete the two .gem files from C:\webserver\
Install Redmine
- Procedure below assumes we will be installing Redmine 1.0.4, but it also works with any revisions >= r3235
- Download "redmine-1.0.4.zip" from here
- Extract the contents of the redmine-1.0.4 directory in the archive to C:\webserver\Redmine
- Log into MySQL as root using "MySQL Workbench". You can also use command prompt or another tool, such as "MySQL GUI Tools" or "phpMyAdmin".
- "Open connection to Start Querying"
- In SQL Query window enter the following script:
create database redmine character set utf8; create user 'redmineUser'@'localhost' identified by 'myPassword'; grant all privileges on redmine.* to 'redmineUser'@'localhost';
- "Execute SQL Script in Connected Server"
- You should of course change redmineUser and myPassword to something different.
- Copy C:\webserver\Redmine\config\database.yml.example to C:\webserver\Redmine\config\database.yml
- Edit C:\webserver\Redmine\config\database.yml file to configure your database settings for "production" environment. It should look like this:
production: adapter: mysql database: redmine host: localhost username: redmineUser password: myPassword encoding: utf8
- Set username and password to the values entered in the SQL script above.
- Save and close the file.
- Create (or update) Redmine database tables
- in command window, execute:
cd C:\webserver\Redmine set RAILS_ENV=production rake generate_session_store rake db:migrate
- If you encounter this error: Mysql::Error: query: not connected: CREATE TABLE `schema_migrations` (`version` varchar(255) NOT NULL) ENGINE=InnoDB :
- download libmySQL.dll from here
- move this .dll file to C:\webserver\Ruby\bin\
- in command window, again execute:
rake db:migrate
- If you encounter this error: Mysql::Error: query: not connected: CREATE TABLE `schema_migrations` (`version` varchar(255) NOT NULL) ENGINE=InnoDB :
- in command window, execute:
- If this is a fresh install, you can pre-populate the tables with default data
- in command window, execute:
rake redmine:load_default_data
- in command window, execute:
- Assuming that we will be hosting Redmine under http://localhost/redmine
- Edit C:\webserver\Redmine\config\environment.rb file to configure Redmine to work as a sub-URI (Apache configuration is also required and is listed later on in this document).
- add the following line at the bottom of the file:
Redmine::Utils::relative_url_root = "/redmine"
- save and close the file.
- This is a preferred way of setting up the application prefix. Mongrel_rails service "--prefix" directive does NOT work with Rails 2.3.x
- Optionally, you can add a following initializer, but ONLY IF you want to use "--prefix" in "Mongrel_rails service" command instead of changing "environment.rb":
- Create a file config/initializers/patch_for_mongrel.rb [name of file can be anything]:
# Fix for mongrel which still doesn't know about Rails 2.2's changes, # We provide a backwards compatible wrapper around the new # ActionController::base.relative_url_root, # so it can still be called off of the actually non-existing # AbstractRequest class. module ActionController class AbstractRequest < ActionController::Request def self.relative_url_root=(path) ActionController::Base.relative_url_root=(path) end def self.relative_url_root ActionController::Base.relative_url_root end end end # # Thanks to http://www.ruby-forum.com/topic/190287
- Create a file config/initializers/patch_for_mongrel.rb [name of file can be anything]:
- Optionally, you can add a following initializer, but ONLY IF you want to use "--prefix" in "Mongrel_rails service" command instead of changing "environment.rb":
Setup windows services
- Memory usage is greatly affected by the number of mongrels running. Keep that in mind when deciding on how many processes you want to run. For example, memory usage on Windows Server 2003 x64 SP2:
- Apache = 5MB + 20MB + 40MB = 65MB
- MySQL = 35MB
- Mongrel cluster = number-of-mongrel_rails-services x (3MB + 90MB) = 279MB (@3 processes)
- Create windows services
- in command window, execute:
mongrel_rails service::install -N mongrel_redmine_3001 -D "Mongrel serving Redmine on 3001" -p 3001 -e production -c C:\webserver\Redmine mongrel_rails service::install -N mongrel_redmine_3002 -D "Mongrel serving Redmine on 3002" -p 3002 -e production -c C:\webserver\Redmine mongrel_rails service::install -N mongrel_redmine_3003 -D "Mongrel serving Redmine on 3003" -p 3003 -e production -c C:\webserver\Redmine
- in command window, execute:
- Start windows services, which in turn will start mongrel servers
- in command window, execute:
net start mongrel_redmine_3001 net start mongrel_redmine_3002 net start mongrel_redmine_3003
- in command window, execute:
- Go to the Windows Services list and set all "Mongrel serving Redmine on 300#" services to start automatically
- in command window, execute:
services.msc /s
- find each one of "Mongrel serving Redmine on 300#" services
- right click, select Properties
- set Startup type to "Automatic"
- press OK and repeat for the remaining Mongrel services.
- Alternatively you can execute this command on elevated command prompt for each mongrel service installed:
sc config mongrel_redmine_3001 start= auto
- in command window, execute:
Configure Apache 2.2.x as proxy to Mongrel cluster
- Procedure below assumes we will be hosting Redmine under http://localhost/redmine and must match the relative_url_root set above
- Open C:\webserver\Apache\conf\httpd.conf
- At the bottom of this file add the following line:
Include conf/httpd-proxy-mongrel.conf
- Create a file C:\webserver\Apache\conf\httpd-proxy-mongrel.conf
- Enter the following:
<IfModule !mod_proxy.c> LoadModule proxy_module modules/mod_proxy.so </IfModule> <IfModule !mod_proxy_http.c> LoadModule proxy_http_module modules/mod_proxy_http.so </IfModule> <IfModule !mod_proxy_balancer.c> LoadModule proxy_balancer_module modules/mod_proxy_balancer.so </IfModule> ProxyPass /redmine balancer://redmine_cluster ProxyPassReverse /redmine balancer://redmine_cluster <Proxy balancer://redmine_cluster> BalancerMember http://127.0.0.1:3001 BalancerMember http://127.0.0.1:3002 BalancerMember http://127.0.0.1:3003 </Proxy> - Restart the Apache service.
- in command window, execute:
C:\webserver\Apache\bin\httpd.exe -w -n "Apache2.2" -k stop C:\webserver\Apache\bin\httpd.exe -w -n "Apache2.2" -k start
- in command window, execute:
DONE!
Your local installation of Redmine is now accessible at http://localhost/redmine
머 어쩌구 저쩌구 하는데 다 필요없고 글 하단 부 쯤
Install mongrel-service + win32-service gems
요 부분 부터 심도 있게 보시면 되겠다.요기 보면 gem install mongrel_service 하기 전에 같은 폴더에
파일 두개를 받으라고 하는데
mongrel_service-0.3.4-i386-mswin32.gem이랑
win32-service-0.5.2-mswin32.gem
글 옆에 받는 주소가 있다. 히어~
2-10-1.mongrel_service-0.3.4-i386-mswin32.gem
다운주소 : http://rubyforge.org/frs/?group_id=1306에서 mongrel_service-0.3.4-i386-mswin32.gem
검색 하면 중간쯤 있음.
2-10-2.win32-service-0.5.2-mswin32.gem
다운주소 : 현재 링크 깨져 있음.
아무튼 위쪽 두파일 :
2-10-3.위 두 파일을 나는 걍 ruby/bin에 복사 해놨다.
현재 cmd 경로는 ruby/bin이니까
2-11.mongrel_service 설치
gem install mongrel_service
WARNING: win32-service-0.5.2-x86-mswin32 has an invalid nil value for @cert_chai
n
Successfully installed win32-service-0.5.2-x86-mswin32
Successfully installed mongrel_service-0.3.4-x86-mswin32
2 gems installed
Installing ri documentation for win32-service-0.5.2-x86-mswin32...
Installing ri documentation for mongrel_service-0.3.4-x86-mswin32...
Installing RDoc documentation for win32-service-0.5.2-x86-mswin32...
Installing RDoc documentation for mongrel_service-0.3.4-x86-mswin32...
완료 후 두 파일은 ruby/bin 폴더에서 삭제
3.redmine 설정
3-1.xampp에 apache / mysql on
3-2.mysql에 redmine 디비 생성 / 계정 생성
create database redmine character set utf8;
create user 'redmineUser'@'localhost' identified by 'myPassword';
grant all privileges on redmine.* to 'redmineUser'@'localhost';
당연히 redmineUser와 password는 입맛대로 바꿔도 된다.
3-3. xampp\project\redmine\config\database.yml 설정
# MySQL (default setup).
production:
adapter: mysql
database: redmine
host: localhost
username: 만든 mysql계정
password: 만든 비밀번호
encoding: utf8
3-4. cmd 창에서 xampp\project\redmine으로 이동
set RAILS_ENV=production
rake config/initializers/session_store.rb
rake generate_session_store
rake db:migrate
순차적으로 입력한다.
문제 상황 #1.
1. 만일 rake generate_session_store 시
NOTE: Gem.source_index is deprecated, use Specification. It will be removed on o
r after 2011-11-01.
Gem.source_index called from F:/work/xampp/project/redmine/config/../vendor/rail
s/railties/lib/rails/gem_dependency.rb:21.
rake aborted!
uninitialized constant Gem::SyckDefaultKey
(See full trace by running task with --trace)
이와 같은 메세지가 나오는 경우는 rake 버전이 요구 버전과 맞지 않아서이다(완전 괘삽질함)
2. rake 버전 확인해 본다(rack아니다 rake다. 난 루비전문이 아니라 순간 헷갈렸다.)
gem list -d rake
*** LOCAL GEMS ***
rake (0.9.2.2)
Author: Jim Weirich
Rubyforge: http://rubyforge.org/projects/rake
Homepage: http://rake.rubyforge.org
Installed at: F:/work/xampp/ruby/lib/ruby/gems/1.8
3. 0.8.7버전이 아니면 삭제 한다. 여러개 설치 되있으면 죄다 지운다.
gem uninstall rake -v=0.9.2.2
You have requested to uninstall the gem:
rake-0.9.2.2
rails-2.3.14 depends on [rake (>= 0.8.3)]
If you remove this gems, one or more dependencies will not be met.
Continue with Uninstall? [Yn] y
Remove executables:
rake
in addition to the gem? [Yn] y
Removing rake
Successfully uninstalled rake-0.9.2.2
4. gem list -d rake 확인해 본다
*** LOCAL GEMS ***
5.rake 0.8.7 버전 설치 한다
gem install rake -v=0.8.7
Fetching: rake-0.8.7.gem (100%)
Successfully installed rake-0.8.7
1 gem installed
Installing ri documentation for rake-0.8.7...
Installing RDoc documentation for rake-0.8.7...
6.0.8.7인지 확인해 본다
*** LOCAL GEMS ***
rake (0.8.7)
Author: Jim Weirich
Rubyforge: http://rubyforge.org/projects/rake
Homepage: http://rake.rubyforge.org
Installed at: F:/work/xampp/ruby/lib/ruby/gems/1.8
Ruby based make-like utility.
다시
set RAILS_ENV=production
rake generate_session_store
rake db:migrate
해본다.
문제 상황 #2.
NOTE: Gem.source_index is deprecated, use Specification. It will be removed on o
r after 2011-11-01.
Gem.source_index called from F:/work/xampp/project/redmine/config/../vendor/rail
s/railties/lib/rails/gem_dependency.rb:21.
rake aborted!
uninitialized constant Gem::SyckDefaultKey
(See full trace by running task with --trace)
위쪽 문제 상황 #1을 하고 난뒤에
rake config/initializers/session_store.rb나
rake generate_session_store나
rake db:migrate 할 시 아래와 같이 문제상황 #1과 같은 지속적인 에러가 날 경우.
gem 버전을 확인해 본다
gem list나 gem -v를 하면 1.3.7버전이 나와야 한다.
나같은 경우는 1.8.xx 버전이 나왔다.(아마 작업 초반에 gem update 를 실행해서
자동으로 최신게 받아져서 그런거 같다.
gem list 시 rubygems-update-1.8.12(나 같은 경우임)가 보이면 삭제한다.
그 후 gem 1.3.7로 업데이트 한다.
gem update --system 1.3.7
Installing RubyGems 1.3.7
RubyGems 1.3.7 installed
癤?== 1.3.7 / 2010-05-13
NOTE:
http://rubygems.org is now the default source for downloading gems.
You may have sources set via ~/.gemrc, so you should replace
http://gems.rubyforge.org with http://rubygems.org
http://gems.rubyforge.org will continue to work for the forseeable future.
New features:
* `gem` commands
* `gem install` and `gem fetch` now report alternate platforms when a
matching one couldn't be found.
* `gem contents` --prefix is now the default as specified in --help. Bug
#27211 by Mamoru Tasaka.
* `gem fetch` can fetch of old versions again. Bug #27960 by Eric Hankins.
* `gem query` and friends output now lists platforms. Bug #27856 by Greg
Hazel.
* `gem server` now allows specification of multiple gem dirs for
documentation. Bug #27573 by Yuki Sonoda.
* `gem unpack` can unpack gems again. Bug #27872 by Timothy Jones.
* `gem unpack` now unpacks remote gems.
* --user-install is no longer the default. If you really liked it, see
Gem::ConfigFile to learn how to set it by default. (This change was made
in 1.3.6)
* RubyGems now has platform support for IronRuby. Patch #27951 by Will Green.
Bug fixes:
* Require rubygems/custom_require if --disable-gem was set. Bug #27700 by
Roger Pack.
* RubyGems now protects against exceptions being raised by plugins.
* rubygems/builder now requires user_interaction. Ruby Bug #1040 by Phillip
Toland.
* Gem::Dependency support #version_requirements= with a warning. Fix for old
Rails versions. Bug #27868 by Wei Jen Lu.
* Gem::PackageTask depends on the package dir like the other rake package
tasks so dependencies can be hooked up correctly.
------------------------------------------------------------------------------
RubyGems installed the following executables:
F:/work/xampp/ruby/bin/gem
RubyGems system software updated
3-4-1. 문제 상황을 해결 하였다면 다시금 맘을 가듬고 해본다.
set RAILS_ENV=production
rake generate_session_store
rake db:migrate
3-4-2.
rake generate_session_store
Please install RDoc 2.4.2+ to generate documentation
나는 이런 메세지가 나왔는데 일단 무시했다.
3-4-3.rake db:migrate
rake db:migrate 시
(파일이 아예 없다고 뜨는데 지금은.
본래는 머가 안맞다고 뜬다. 아무튼 간에 xampp의 mysql/lib에 있는 LIBMYSQL.dll을 복사해서
ruby/bin에 넣어 준다. 아니면 첨부한 파일 받던가.
첨부파일 :
혹시 mysql에 connect할 수 없다고 나오면 cmd에서 mysql 해 보고 mysql 로긴이 되는지 보고
만일 안되면 환경 변수에 xampp/mysql/bin폴더를 등록 시키고 cmd 다시 열어서
rake db:migrate 해본다.
문제 상황 #3.
libmysql.dll이 에러가 나서 xampp 1.7.7/mysql/lib(대략 용량이 3.81M) 의 것을 복사해서 ruby/bin에 붙여놓고
다시 해보니 이번엔 연결을 할 수 없다고 에러가 나온다.
Mysql::Error: query: not connected: CREATE TABLE `schema_migrations` (`version`
varchar(255) NOT NULL) ENGINE=InnoDB
이 또한 libmysql.dll 때문이다.
뒤지던 중 다른 libmysql.dll( 대략 1.4MB)을 구해서 복사한다.
첨부파일 :
참고 내것의 redmine/config/database.yml의 설정은
# MySQL (default setup).
production:
adapter: mysql
database: redmine
host: localhost
username: 아이디
password: 비번
encoding: utf8
development:
adapter: mysql
database: redmine
host: localhost
username: 아이디
password: 비번
encoding: utf8요렇게 설정 되어 있다.
rake db:migrate 했을 시 별 문제 없다면
엄청난 메세지와 함께 테이블을 쫙 만들 것이다.
mysql에 redmine 디비에 테이블 생성 됬느지 확인 해보면 된다.
너무 길어 걍 젤 마지막 문구
== CreateChangesetParents: migrated (0.3281s) ================================
libmysql.dll 참조한 페이지
http://railsforum.com/viewtopic.php?id=34012
이쯤 되면 redmine이 뜨는지 확인해 본다
cmd에서 redmine 폴더에서 아래 실행
ruby script/server -e production
=> Booting Mongrel
=> Rails 2.3.14 application starting on http://0.0.0.0:3000
=> Call with -d to detach
=> Ctrl-C to shutdown server
보시다 시피 포트는 3000번이다
웹 브라우저로 확인 해본다
http://localhost:3000
css나 jquery가 알맞게 먹어서 정상적인(?) redmine 홈페이지 첫 화면이 나오면 된다.
4.mongrel_service 남았따.
흠흠.
'Project 관리 > redmine' 카테고리의 다른 글
| redmine 1.3.0 설치 for window (0) | 2011/12/15 |
|---|---|
| [완료]xampp + redmine + svn(VisualSVN Server) (0) | 2011/01/04 |
| [설정]남은것 (0) | 2011/01/04 |
| [설정] 3.[이슈]redmine with VisualSVN Server 문제 (0) | 2011/01/04 |
| [설치] 2.xampp + VisualSVN 문제 (0) | 2011/01/03 |
| [설치] 1.수동설치 xampp + redmine + visualsvn for window (0) | 2011/01/01 |
xampp-win32-1.7.7-VC9.part15.rar
xampp-win32-1.7.7-VC9.part01.exe
redmine-1.3.0.zip
libmySQL.dll

